Learn How to Create Negative Space in Photoshop ~ Blog
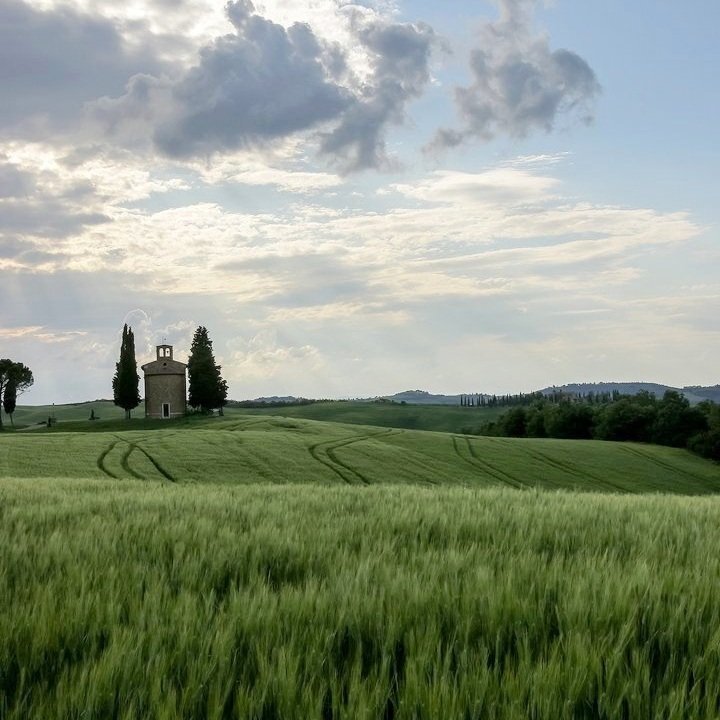
Landscape
For example, this image taken in Tuscany in 2018. I wanted to capture the foreground with the beautiful sweeping lines of the wheat, however on the left hand side was another building, which I did not want in the composition. I liked the rolling mountains on the left hand side as a backdrop. Light was fading fast so I took different angles, leading lines to get a variety of compositions.
I wrote a BLOG on how I created this image when I was a serious landscape photographer.
Negative space is an excellent tool for photographers and creatives. While the positive space in an image is its main focus – the object itself – negative space is just as important. As we know from the famous yin and yang symbol, both forces need to be present. We can't have positive space without negative space and vice versa. And this negative space between, within and surrounding an object in an image can be used smartly to great effect.
Negative space will allow you to create an image that will feel dramatic. It will attract a viewer to it and then lead their eyes around your photo or image.
When photographing think of the negative space as part of the composition. However, there are times you cannot capture that negative space you are after. What do you do if your photo or creative image needs more negative space? My go to Photoshop technique is to extend the canvas. This allows me to add negative space where I need it.
The 2 examples shown here ~ a Landscape and a Creative image I have added negative space and extended the canvas in my processing workflow.
Think First Technique
Before you start “think first not fix up later”. When you open your image look at it and think what it is I like or don’t like or what can I do to make it more appealing composition wise. It is better to “think first then try to fix up later”, when it might not work. Lessons learnt along the way!
If I am going to extend the canvas I usually do this early in my workflow before I have added too many layers. It is about “seeing” or having the vision for your image.
How to extend your canvas

Creative
I will also use this technique when creating my creative composite imagery. Sometimes I will look at my composition and think it needs more negative space either on the sides or the sky needs more space for elements to breathe.
With this image I started with a Fine Art Texture, added the clouds, house and other elements, but I found when I added the tree as an afterthought, there was not enough negative space for the tree to “breathe” so I extended the canvas.
Open photo/ image in Photoshop
Duplicate Layer (Ctrl +J or Cmd + J)
Select the crop tool (If you can’t see your tools panel, click on Windows/Tools)
Click in the middle of your image, the crop grid will appear, now select the middle handle on the left or right side of the crop grid.
When it is a size you want let go of the handle. You will now see a white/or transparent area added to your image. Click on the tick in the menu bar to confirm crop.
You will need to select the blank area you have created, to do this use the Magic Wand Tool, this is located on your Tools panel.
Move your Magic Wand Tool and click in the middle of extended canvas. You will notice black marching ants now appear around that area (the area has been selected)
Now go to Edit > Fill make sure in Contents field -Content Aware is showing click OK. Now Photoshop will work its magic, in a moment, the area will be filled in with a section taken from your image.
The area may not be completely filled, you may need to do this technique again. You may have to tidy up areas with the clone or spot healing tools if the filled area is blotchy.
Add it to your Editing Toolbox
It is a handy technique to have in your “editing toolbox”. Though sometimes you have to use a combination of other techniques to make it work.
Have fun using negative space, it can add another dimension to your landscapes or creative images or any other form of photography or creative work.


MORE TIPS
If you liked this Photoshop check out the FREE LEARNING HUB with lots more tips and techniques.
“No amount of learning goes to waste. It adds to building your skill set.”